Today seems like a good day to do another tutorial, so I selected one I've wanted to do for a long time.
In this one, Photoshop User Magazine writer, Larry Becker, answers questions posed by NAPP members.
In this one, Photoshop User Magazine writer, Larry Becker, answers questions posed by NAPP members.
I've tried to use some of the filters in Photoshop to convert photos into simulated line drawings. Unfortunately, those line drawings never seem to turn out "basic" enough. Stylize>Find Edges comes close, but it's still not quite simple enough to look like a plain pen-and-ink drawing. Is there an easy way to convert a photograph into a line drawing that's just a bit more primitive looking?
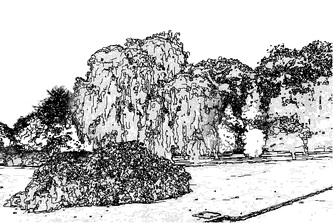
There's one method I use from time to time which creates a simple line drawing from photos but it's kind of hidden. Start by pressing Command-J (PC: Ctrl-J) to duplicate the Background layer (so that you have something to go back to if it doesn't work right). Next, choose the command Filter>Blur>Smart Blur. At the bottom of the dialog that appears, there's a pop-up menu called Mode. Choose Edge Only from that list. Now just move the sliders for Radius and Threshold until you get the kind of line drawing you're looking for. When you click OK it creates white lines on a black background. If you'd rather have black lines on a white background, just press Command-I (PC: Ctrl-I) to invert the layer."
Article by: Larry Becker
Photoshop User Magazine -- Photoshop Q&A -- Pg. 118
December 2011
Composite by: Brian Sheets
25/May/2013
25/May/2013
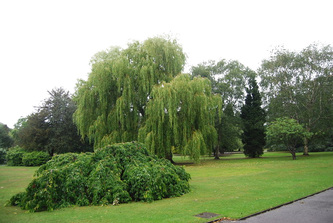
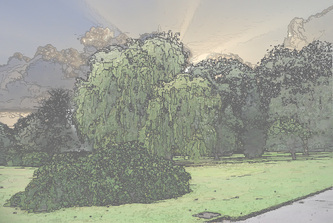
As always, I read through the article to get a feel for the end result. Larry's example was a stylish kitchen with bay windows. Rather than copying his example, I opted for a park setting. In addition, I wanted to go a couple steps beyond the example and make it look like a watercolor painting.
Following the instructions was simple, right up to the Radius and Threshold sliders. With as much depth and variation in color, it was difficult to find a happy medium. Ultimately I duplicated my efforts and combined two versions of the lines.
Next was the sunset. The clouds were much like the trees, but the "god rays" needed a softer outline. Rather than duplicating, like I did with the trees, I used a Mask with a 50% Opacity to soften the lines.
After combining the images, to finish off the water-color look, I placed a white layer over the top and adjusted the Opacity.
I'd love to hear back from you and see what you do with it.
- Brian


 RSS Feed
